ROIPOS.com
Skip to content
  • Knowledge Base
  • Downloads
  • News
betterdocs-category-icon

Videos

2
  • Training – The Basics
  • Updating ROIPOS
betterdocs-category-icon

Point of Sale

9
  • How to make a sale
  • How to Check Sales History
  • How to add New Customer
  • How to edit Customers
  • How to view Held Receipts
  • How to delete Held receipts
  • How to restore Held Receipt
  • How to set Client Default Credit Limit
  • How to manage Cash Drawer
betterdocs-category-icon

Reports

5
  • How to create Stock Inventory report
  • How to create Payment Summary report
  • How to create Sales Tax report
  • How to create Transactions by Employee report
  • How to create Z-Out Store Close report
betterdocs-category-icon

Inventory

4
  • How to remove Stock Items
  • How to edit Stock Items
  • How to edit Stock Departments
  • How to edit Vendors
betterdocs-category-icon

Admin

18
  • How to get Remote Support
  • How to restore your ROIPOS database using Settings Wizard
  • Company Preferences
    • How to edit Store Options
    • How to configure Taxes
    • How to manage Payments
    • How to edit Store Information
    • How to manage Log In
    • How to set your POS screen to Lock automatically
    • How to back up your ROIPOS database
  • Workstation Preferences
    • How to manage Printers
    • How to configure Printers
  • Employees
    • How to edit Groups in Administration
    • How to add New Employee to Employee List
    • How to make Inactive employee Active
    • How to change password
    • How to check Clocked In Employees
    • How to manage Pay Periods
    • How to Reset Password
betterdocs-category-icon

End of Day

2
  • How to perform End of Day
  • How to close Program at End of Day
betterdocs-category-icon

Tech Issues

9
  • Quickbooks Error 0x8004041D Fix for ROIPOS
  • How to fix error Quickbooks Error 0x8004041D for Roipos
  • How to Restore GPRatePro.exe File After Avast Antivirus Blocked It
  • How to Create an Exception for GP Rate Pro in Avast Antivirus
  • How to change the Windows 10 network type from Public to Private using PowerShell   
  • Configuring Windows Firewall Ports
  • How to find Location for Setup Log files
  • How to manage Log Messages
  • ROIPOS log files location
  • Home
  • Knowledge Base
  • Admin
  • Workstation Preferences
  • How to configure Printers

How to configure Printers

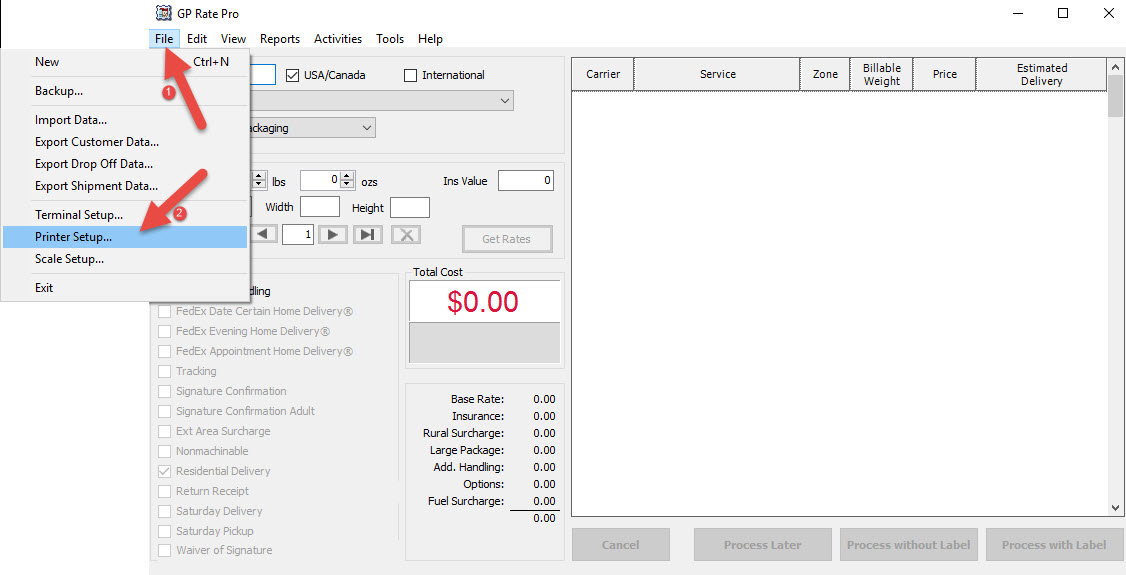
  1. Go to File, then click on Printer Setup.

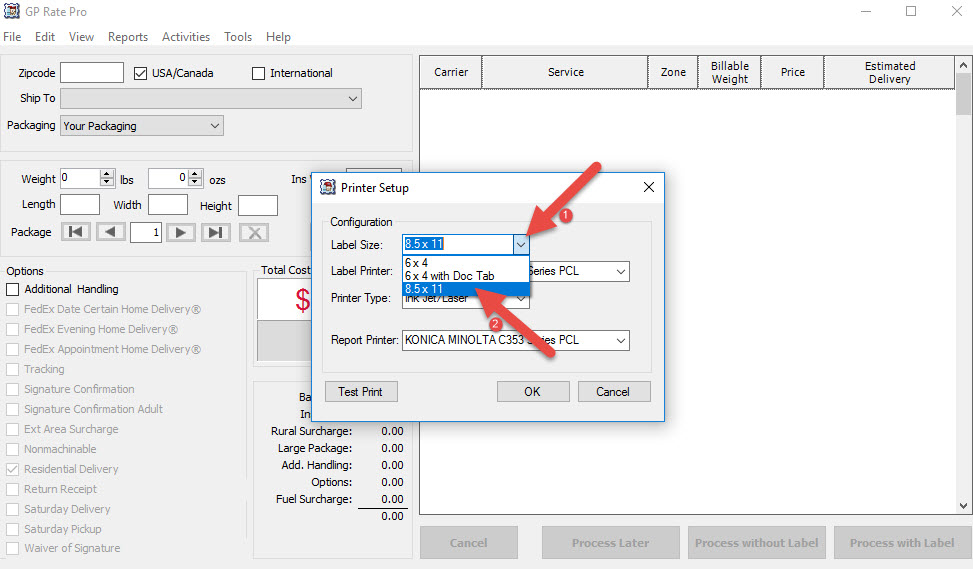
2. Printer Setup dialog window will appear. Click on down arrow next to Label Size and select Label Size from drop down window.

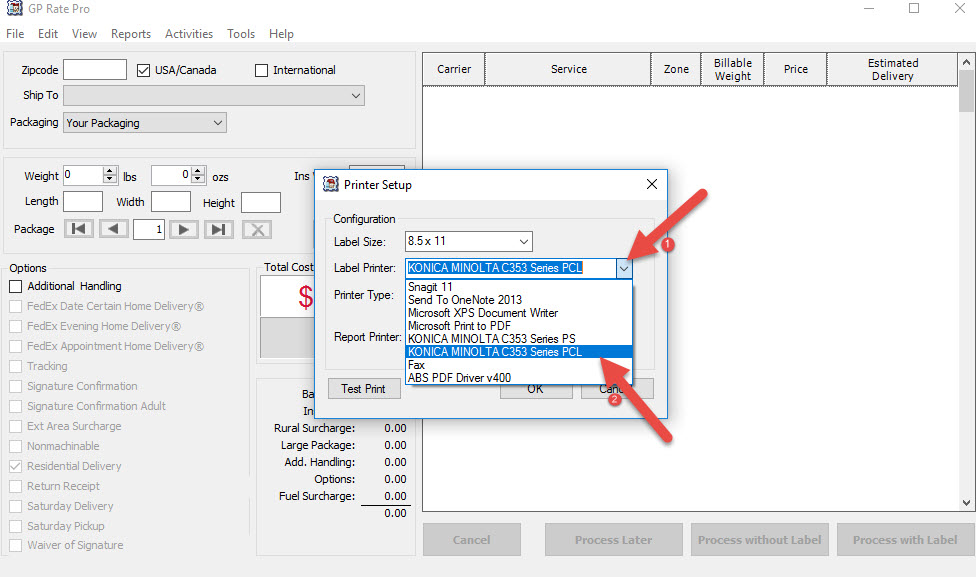
3. Click on down arrow next to Label Printer and select Label Printer that you would like to use.

4. Click on down arrow next to Printer Type and select Printer Type.

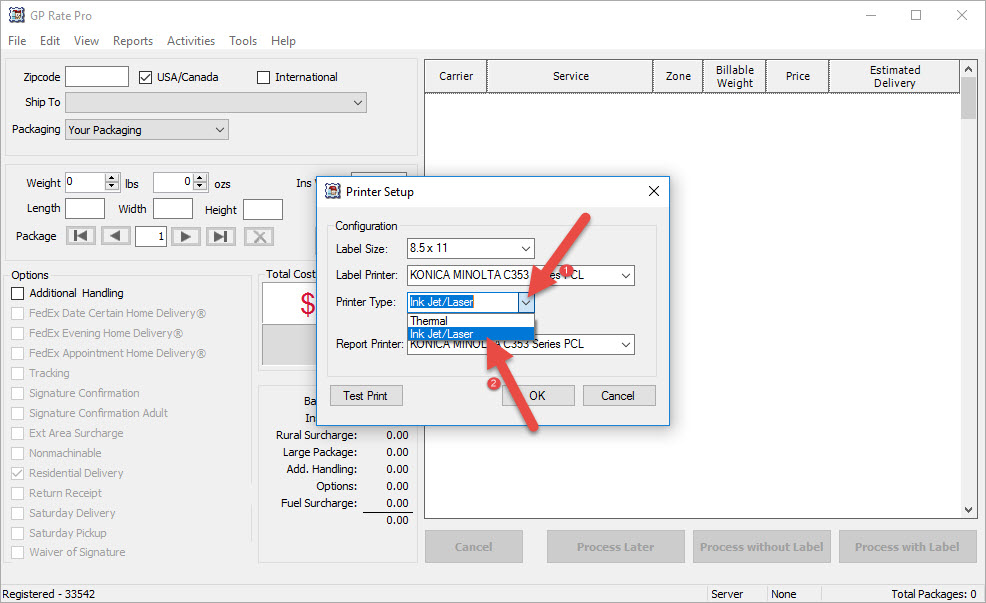
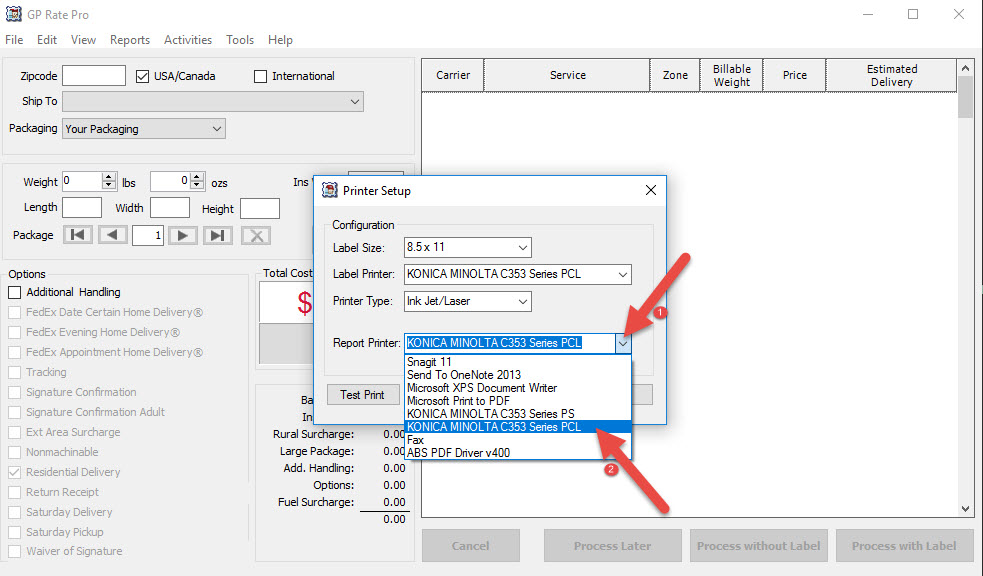
5. Click on down arrow next to Report Printer and select Report Printer.

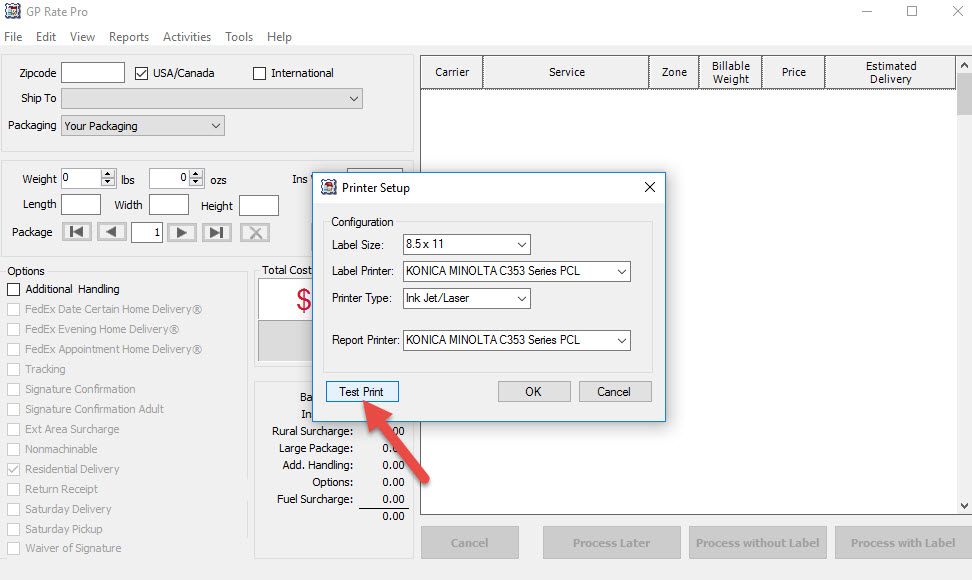
6. To print a test label, click on Test Print.

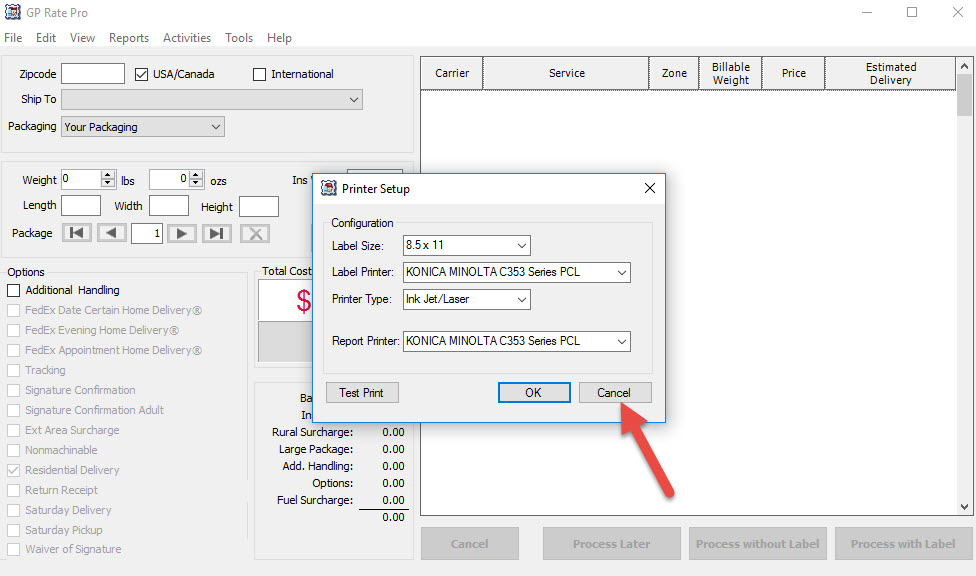
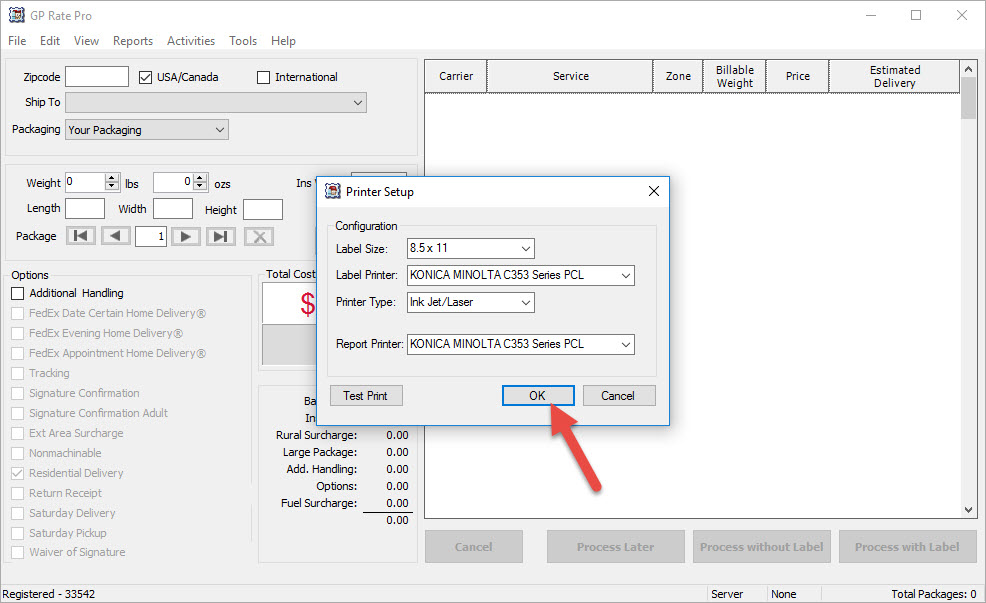
7. Click on OK to confirm configuration choices and dismiss the Printer Setup dialog window.

8. If you wish to cancel Printer Setup, click on Cancel.


What are your Feelings
Share This Article :
  • Facebook
  • Twitter
  • LinkedIn
  • Pinterest
Still stuck? How can we help?

How can we help?

Updated on October 23, 2018
How to manage Printers

Powered by BetterDocs

Leave a Reply Cancel reply

Your email address will not be published. Required fields are marked *