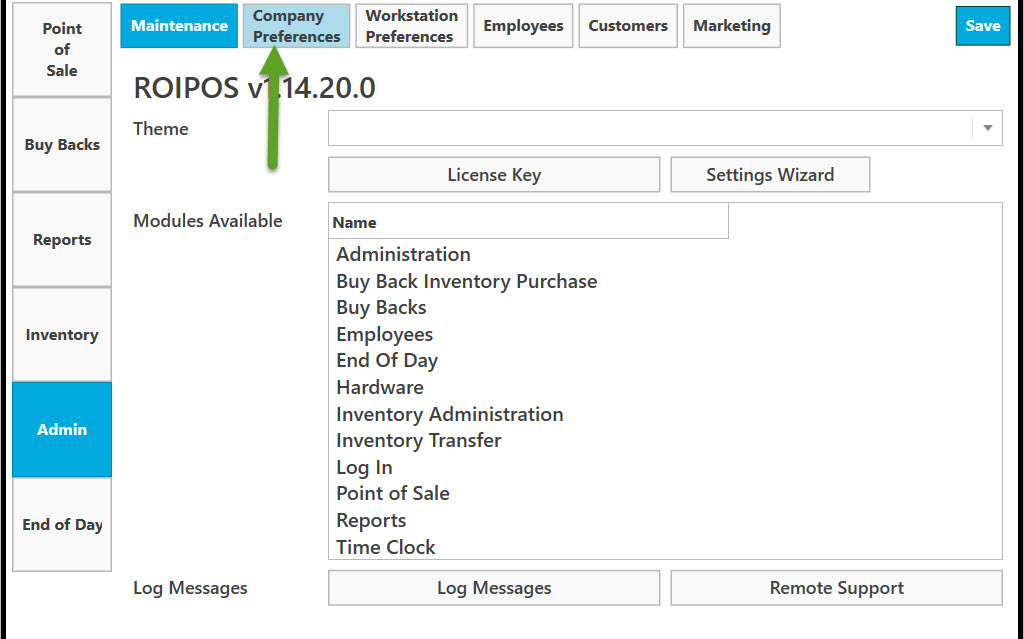
Go to Admin.
Go to Company Preferences.
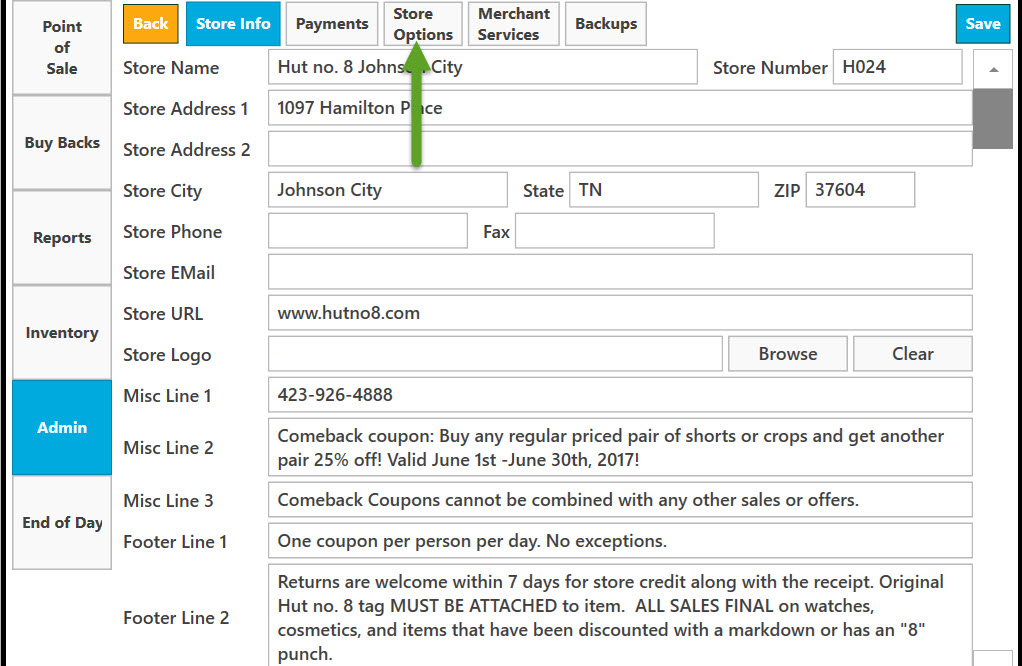
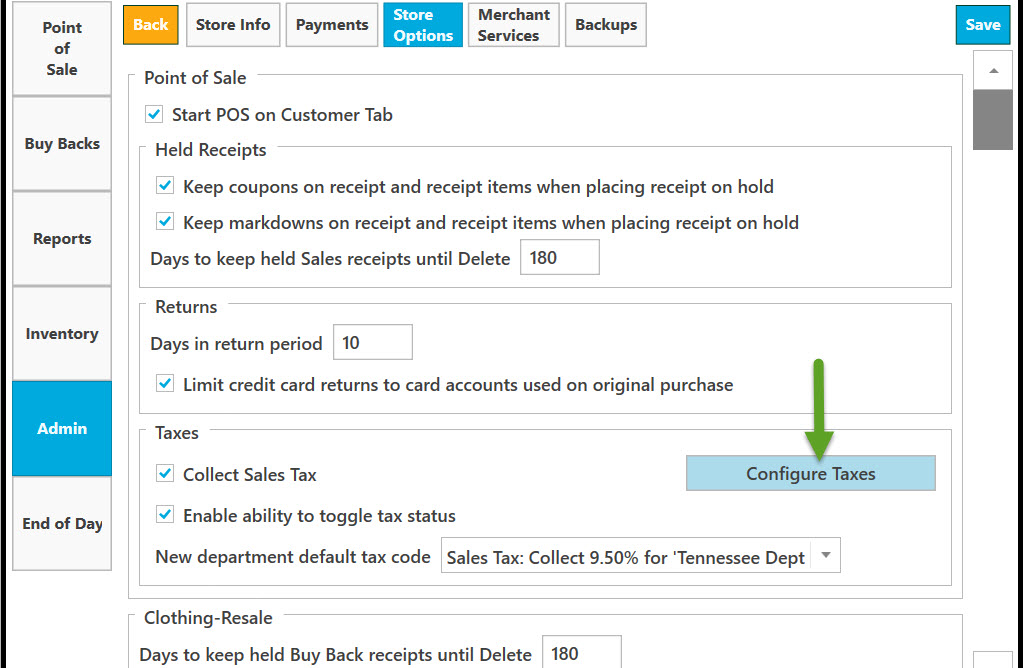
Go to Store Options.
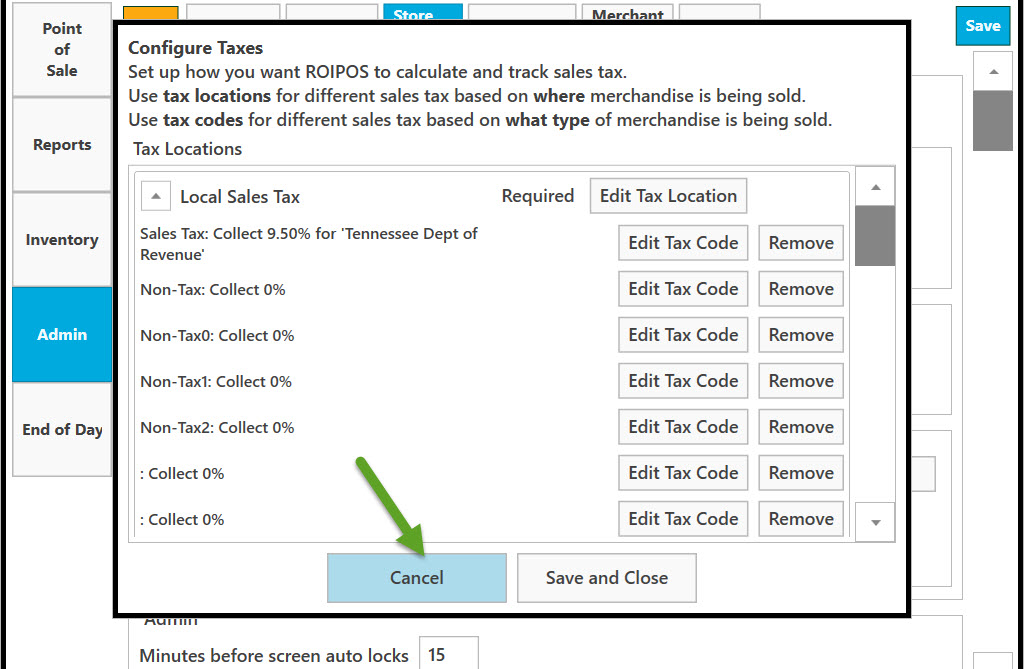
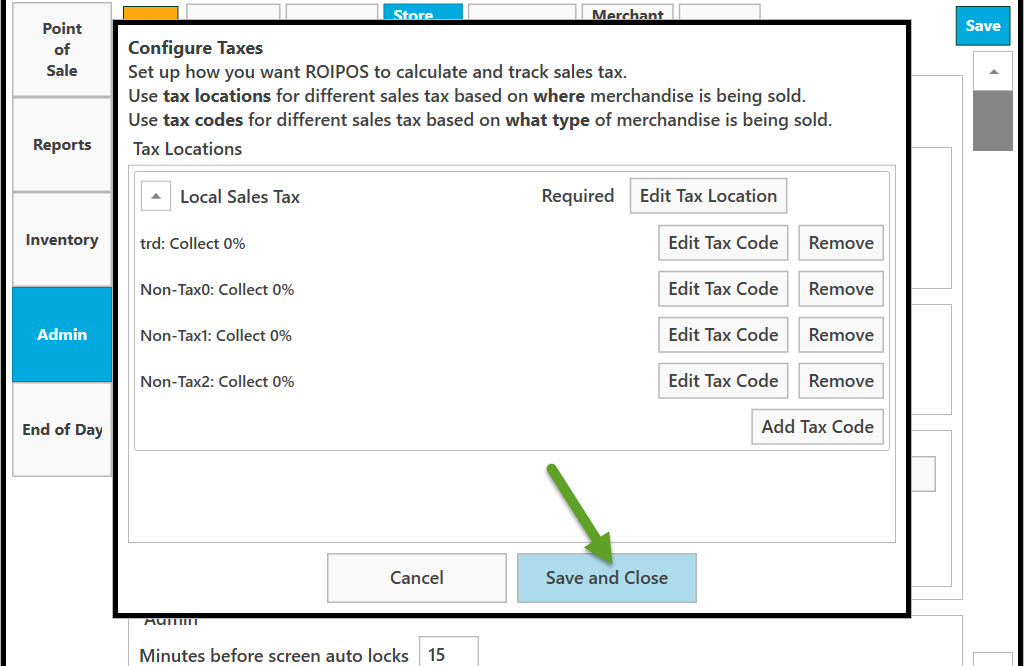
Click on Configure Taxes.
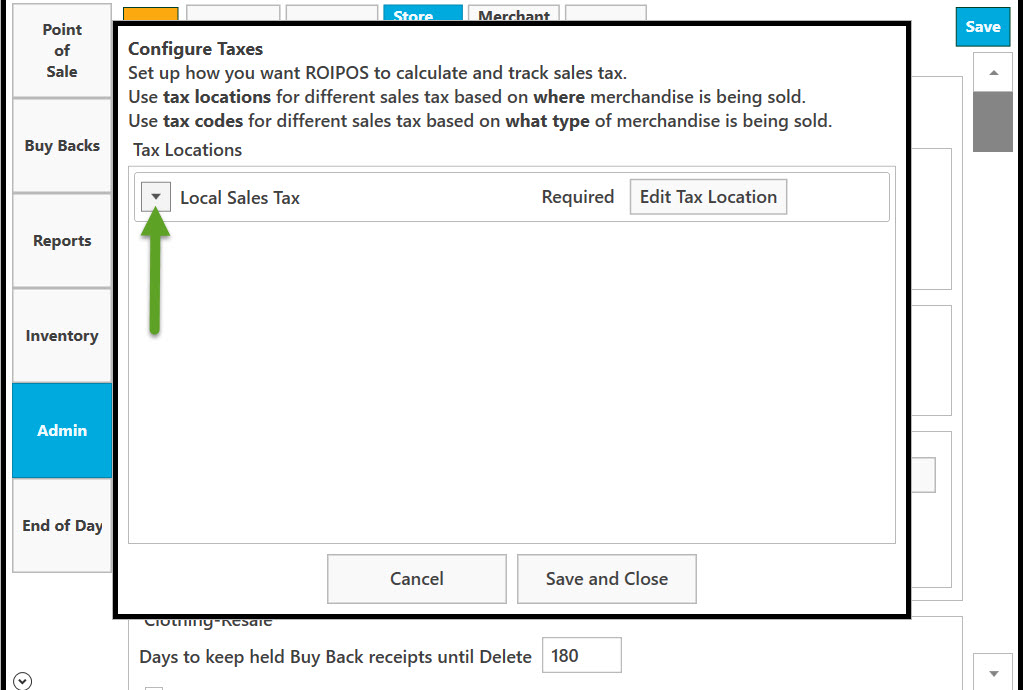
Click on down arrow to see the full list of Local Sales Tax.
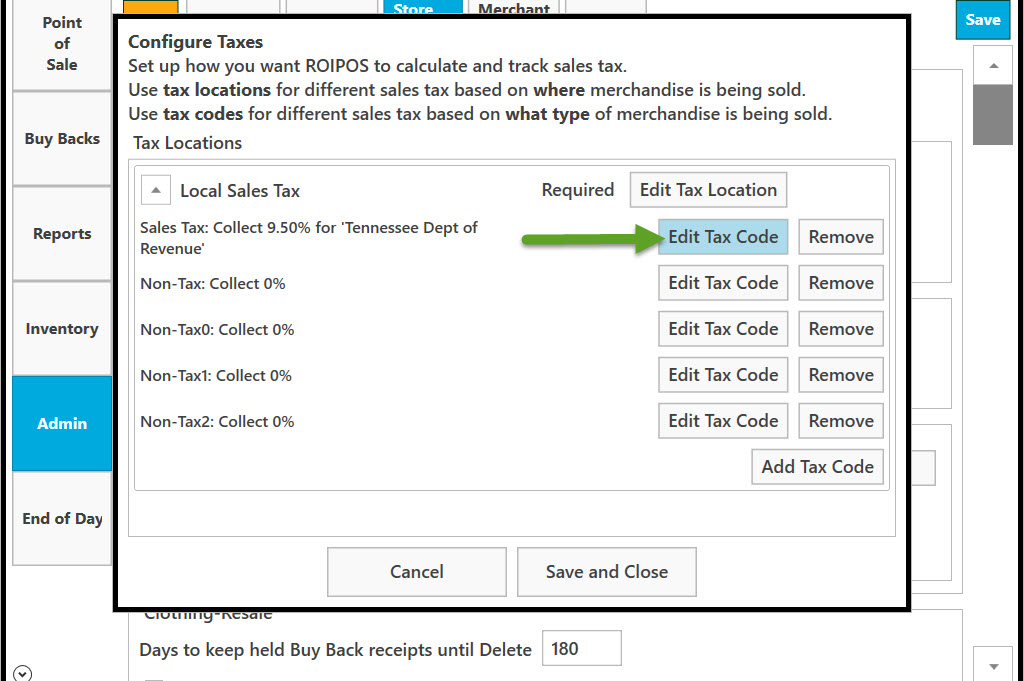
To edit tax code information click on Edit Tax Code button.
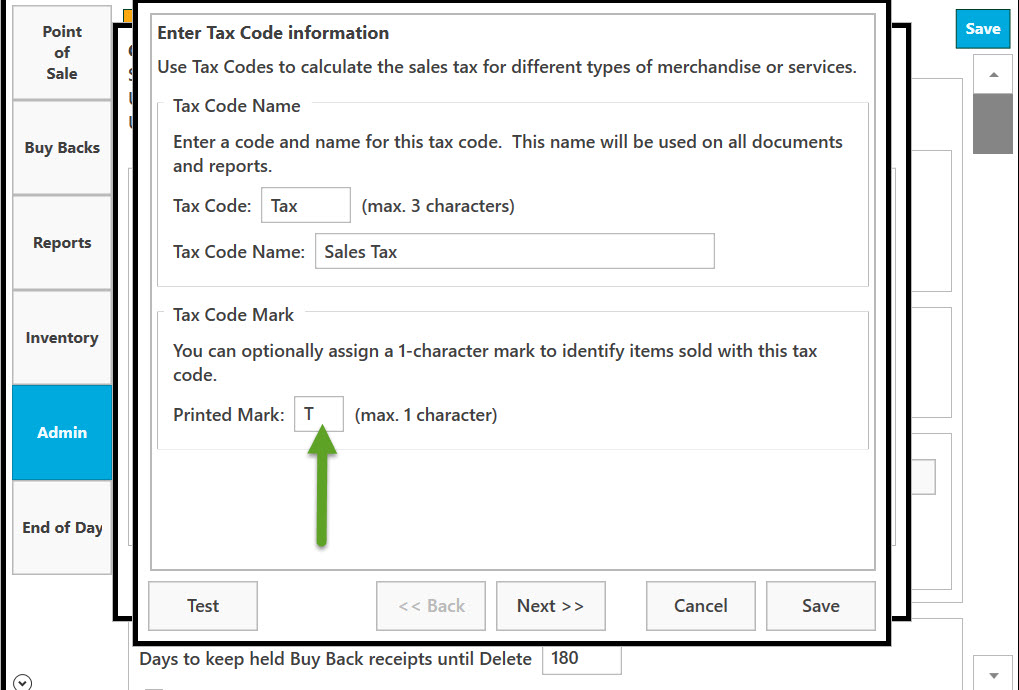
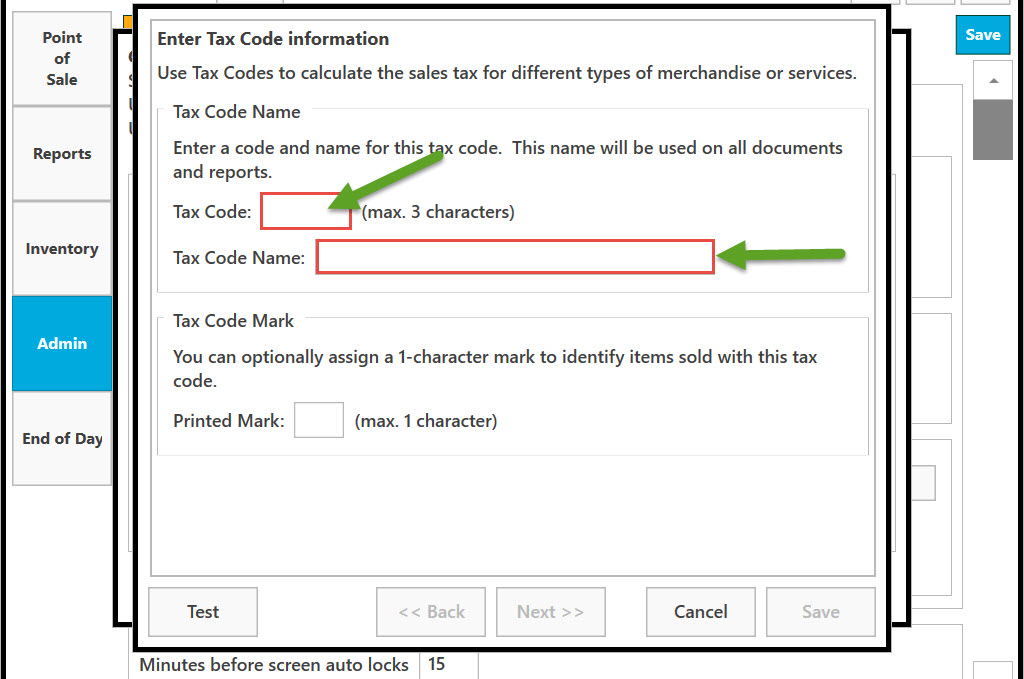
Enter a code and name for this tax code. This name will be used on all documents and reports.
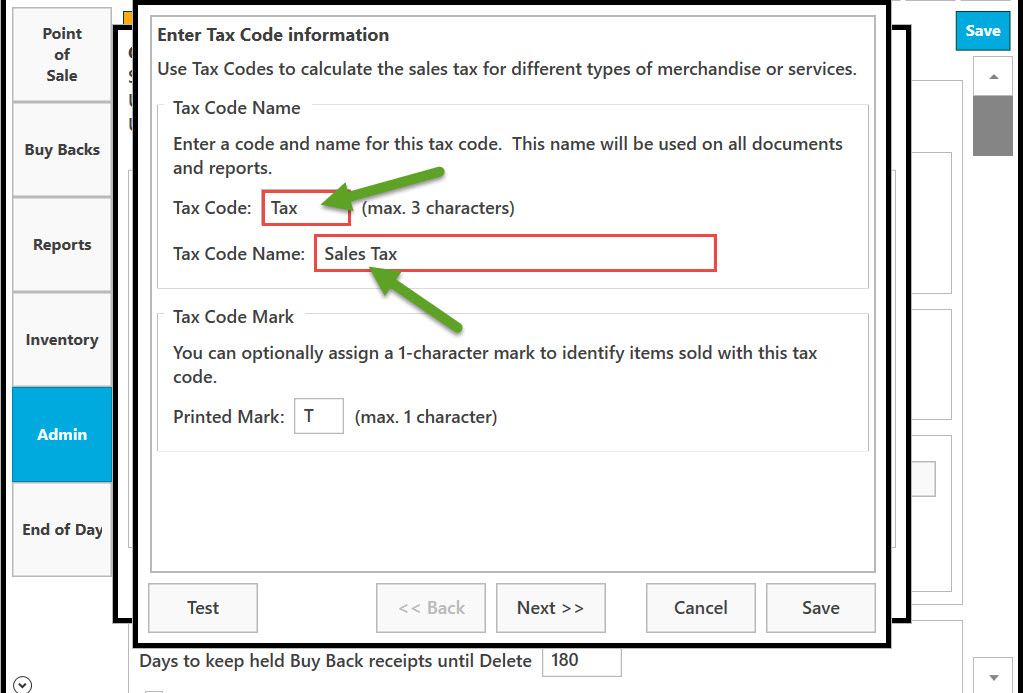
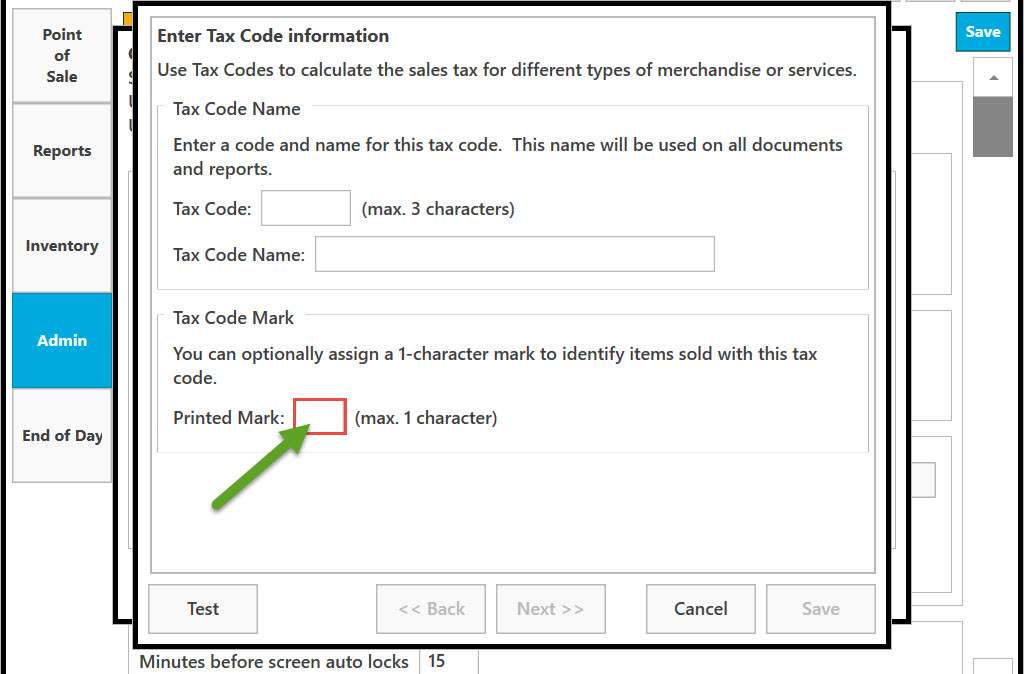
You can optionally assign a 1-character mark to identify items sold with this tax code. Enter the character in the Printed Mark text field.
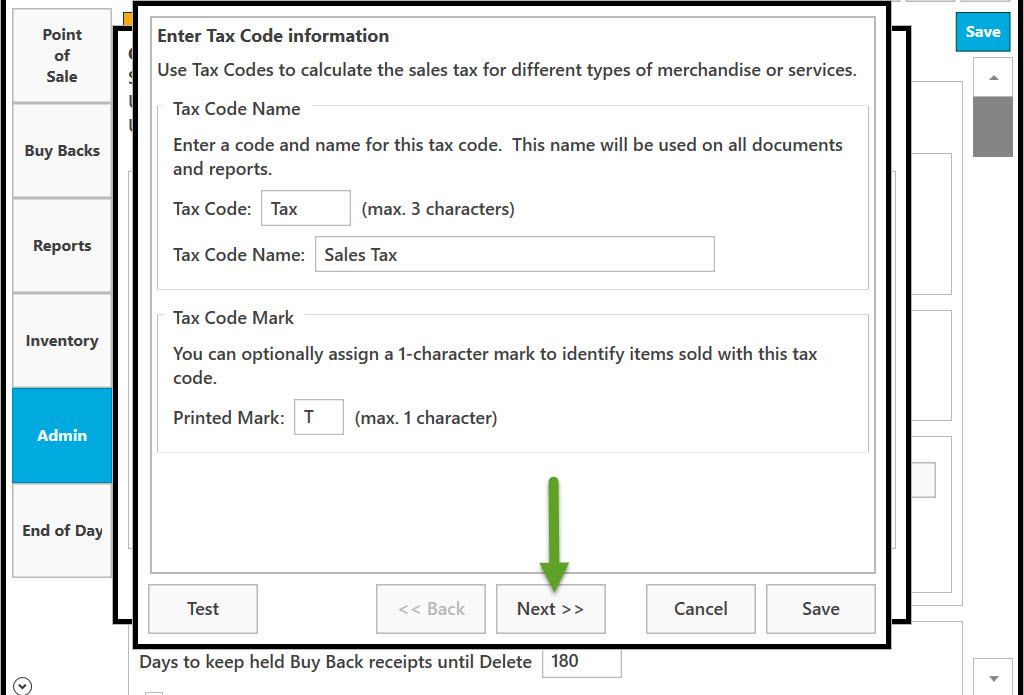
Click on Next to continue.
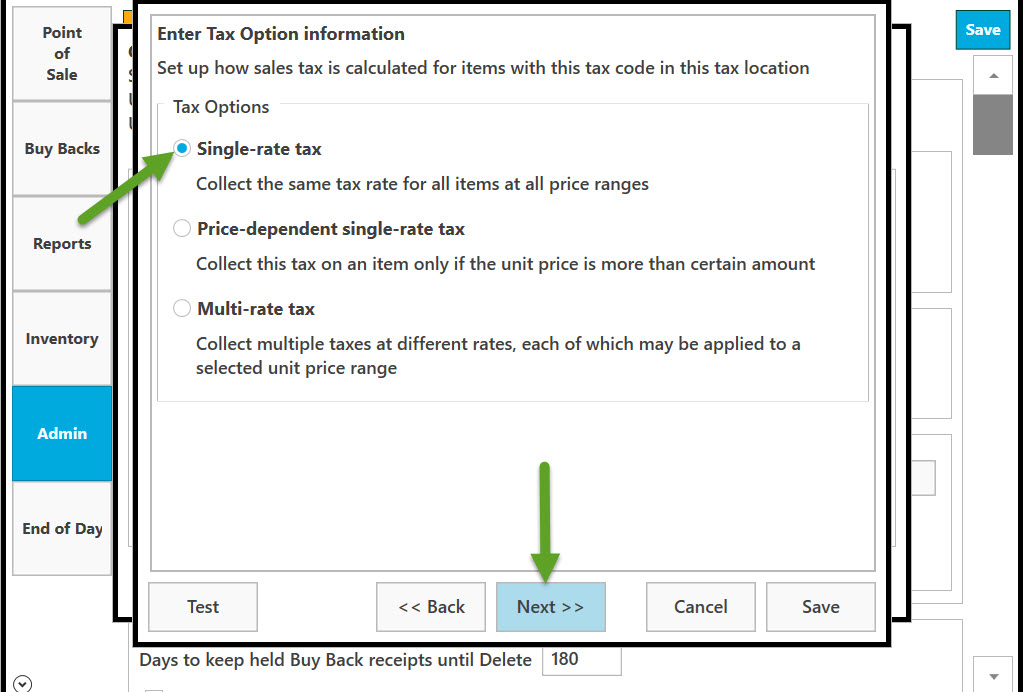
Enter Tax Option Information. Select Tax Option to determine how sales tax is calculated for items with this tax code in this tax location. Click on Next to continue.
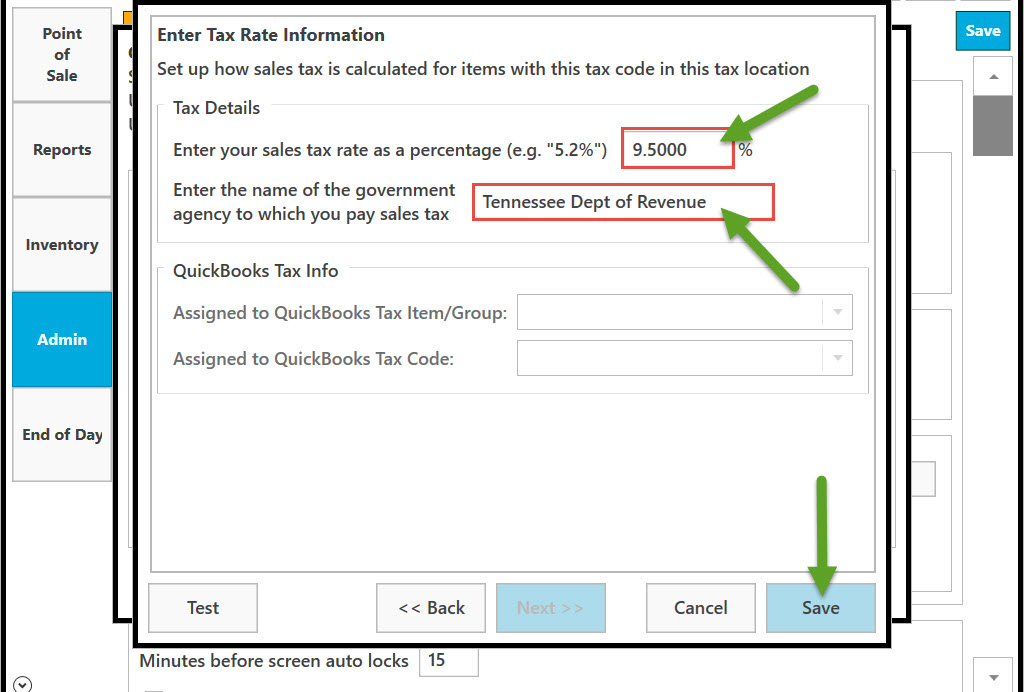
Enter Tax Rate Information. Set up how sales tax is calculated for items with this tax code in this tax location. Enter your sales tax rate as a percentage. Enter the name of the government agency to which you pay sales tax. To save click on Save.
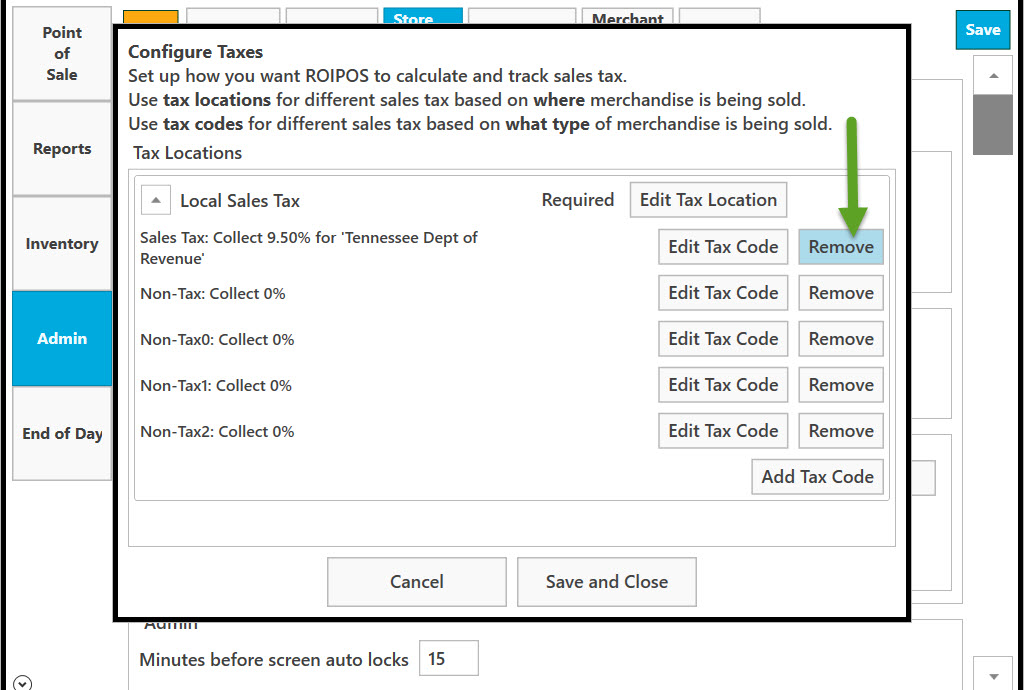
To remove Tax Code click on Remove.
Select a reassignment tax code for the Tax Code you remove. Click on down arrow to see the full list.
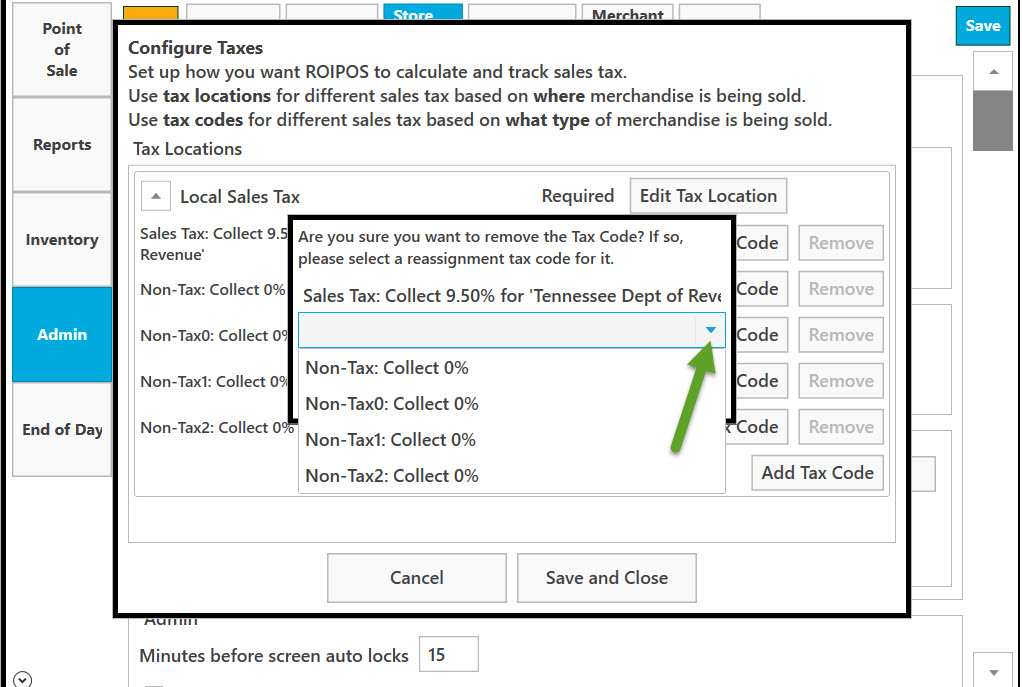
Single left click on a reassignment tax code you want to select.

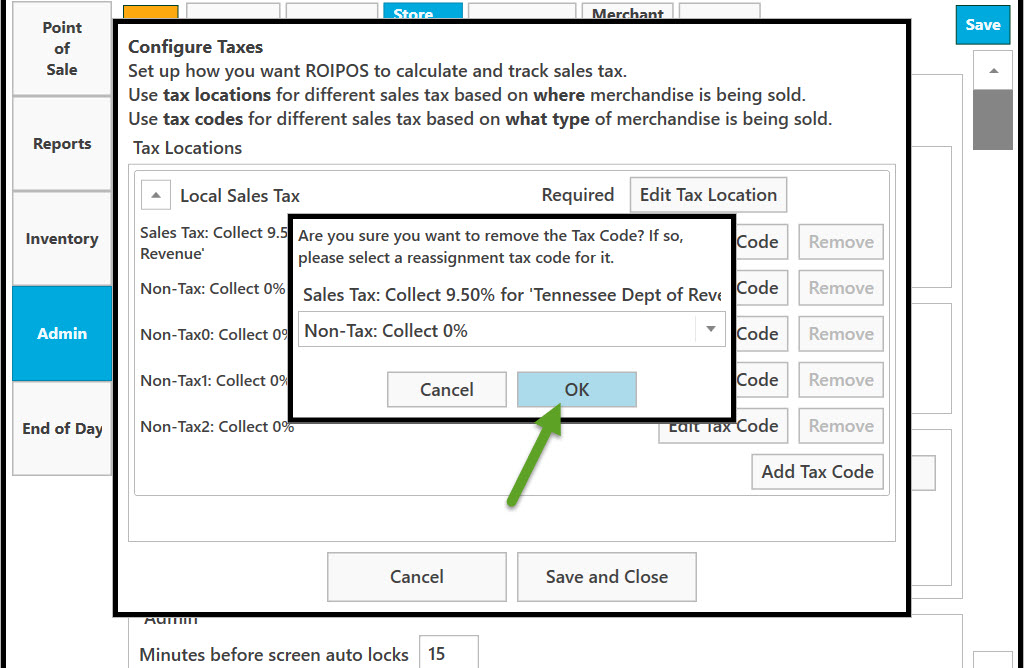
Click on OK to confirm your choice.
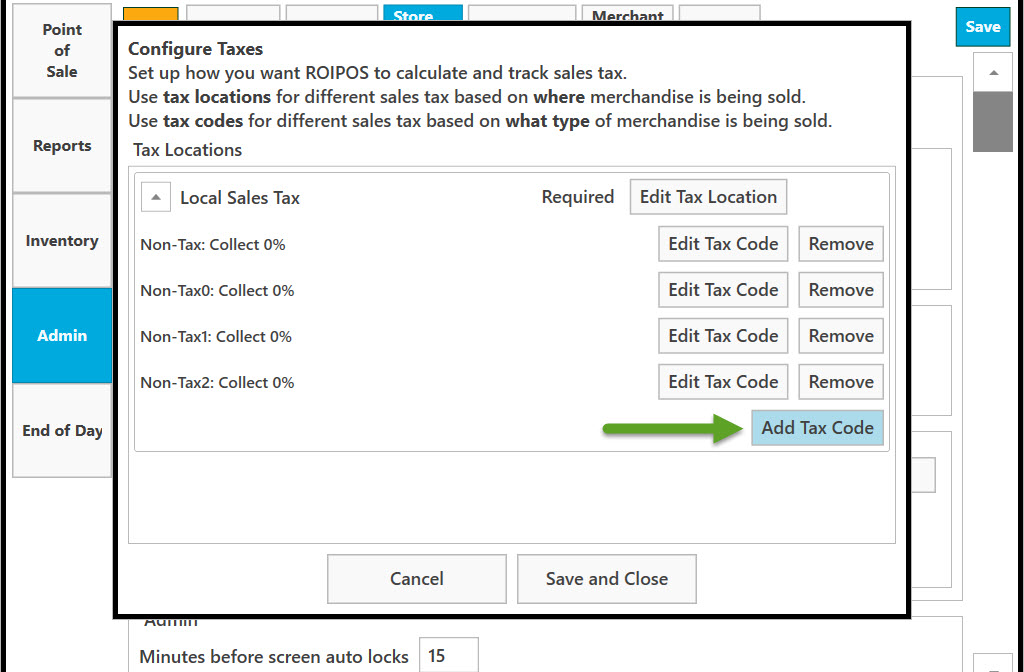
To add tax code click on Add Tax Code button.
Next, enter tax code information. Use Tax Codes to calculate the sales tax for different types of merchandise or services. Enter a Tax Code and Tax Code Name for this Tax Code. This name will be used on all documents and reports. Enter in the text fields.
You can optionally assign a 1-character mark to identify items sold with this tax code. Enter the character in the Printed Mark text field.
To save, click on Save and Close.
Click on Cancel to cancel and go back to the previous page.